Wednesday, 19 September 2012

Solid Surface Renos 8

Note: this is the last post in a series of countertop renovations. See #1 for the beginning and work your way backwards from there. :)

I placed the big sink piece and it fit pretty good. I think I had to scribe a little bit, but not much. Then I placed the other half on top and glued it together.


After sanding the site seam, I hooked up the taps and eventually got the plumbing sorted out too. I had a small leak but some plumbers putty seemed to fix it up!


After a week or two I got around to making the other corner piece. It is made out of four little sink cutouts, and I ran out of colour-matched seamkit so there's a couple of black lines where the seams are. Oh well, it's usually covered with stuff anyway!


Done at last! ...except for some painting and tiling. Oh, and the bar under the windowsill... :) I'm happy with it, it's looking good!

Solid Surface Renos 7


Finally starting to look like something...


I disconnected the old sink, including the garburator. (I made sure the new sink would line up so I wouldn't have to change the drain pipes. It's 1 inch deeper but still fits as the countertop itself is a bit higher.)


Time to take out the old tops! There's a few screws from below.


Routering the drain board with a half-moon type router bit. I shimmed up the straightedge on one end to make a trench that gets deeper towards the sink, helping the water drain away from the countertop.

Monday, 17 September 2012

Solid Surface Renos 6


Profiling the front edges with a quarter inch radius router bit.


Profiling from another angle.


Attaching the sink with silicone, clamps.


Applying build-up and batten strips (to support the many seams).


Front edge, plywood build-up, batten strips (bottom of countertop).

Solid Surface Renos 5


The first few seams. Notice the clamp, spray can and measuring tape--those are strategically placed as weights to make the seams level.


Checking the size so far with my cardboard template.


A mirror seam in progress. The straight router bit takes a sixteenth off of each side, leaving a perfect seam even if my straightedge isn't perfect (it's a little warped).


The main countertop, all one piece now.


I had to cut a big piece off one end to fit the whole top in the elevator; it would be seamed back together in my kitchen. It hurt to cut it apart though! I also cut my sink hole using a plywood template that I drew out using the actual sink basins as a guide.

Solid Surface Renos 4


Should I use the original 8 inch sink or go with a free undermount 9 inch with minimal damage? I decided to go with the new one. I could have undermounted the old one but it's a bit more work.


I laid the sink cutouts over the template to try to figure out where I would put the seams. It's not easy with this shape of countertop!


Sink Cutouts. Corian Maui.


I headed downstairs to the workshop. It's a concrete bunker/bike storage, but it works. I used a skil saw and a plywood straightedge to make my rough cuts. I have a triple chip (melamine) blade that cuts nicely.


Here is a seam that is drying. In the middle is colour-matched seamkit (epoxy). The two pieces being joined are placed on a perfectly level surface and held together with masking tape stretched over blocks. It actually works pretty well. Later the excess glue is belt-sanded away along with any high spots.

Solid Surface Renos 3


Using a hammer to break the old backsplash apart, for templating purposes. No turning back now!


Surprise! Behind the backsplash under the bar was a laminated piece that matched the tops. To be tiled over later.


Using a big piece of cardboard to make a template. I cut around the taps so that I could use the sink until the last minute possible.


A beautiful template. Much more practical to use than measurements and angles.

Sunday, 16 September 2012

Solid Surface Renos 2


Back of the mitre in original countertop, where raised bar (windowsill) joined up. Nicely done.


Side view of above bar.


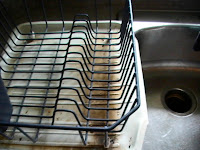
Drain rack and nasty rubber drain board.


Nasty drain board continued. To be replaced by trenches in the countertop itself.


Original countertop over dishwasher. Plan taped to wall.

Solid Surface Renovations 1

So, following is a pictoral review of my recent re&re job. I replaced laminate covetop with solid surface for cheap (but lots of labour hours). At work we did an apartment building a few years back with solid surface, and I saved the sink cutouts. You will see how I seamed them together to make some nice tops!


Here's the solid surface kitchen table I made a few years ago with the same method. It is made of about 8 or 9 sink cutouts. It has been a great surface for eating, especially with kids--foodsafe and easy to clean. I wanted to match the rest of the kitchen, partly for future sale of our condo.


The original countertops (covered with stuff!)


The original top mount sink.


The original countertops, cleaned off.


Mitre joint in the covetop near the sink. It doesn't look too bad but has opened up a bit/swelled up as mitres near sinks tend to do over time, since water makes the particle board under the laminate swell up. I'm guessing that these are 16 years old, but they may be newer.